Weddings are all about celebrating love, and what better way to express that love than with personalized and charming favors? In this blog post, we’ll guide you through a delightful journey of creating your own acrylic candy boxes filled with delectable treats. Our DIY “His & Hers” candy wedding favors are a combination of elegance and sweetness, offering a creative way to thank your guests for being part of your special day.
The best part about this DIY is that it requires only a few materials and is very quick to make. If you’re looking for a super cute addition to your wedding décor, this is definitely worth doing. We’ve broken the process down into only 3 steps, which makes it reasonable for anyone to accomplish!
Things You Will Need:
- 2 Candies of Your Choice (The Bride’s Favorite & Groom’s Favorite)
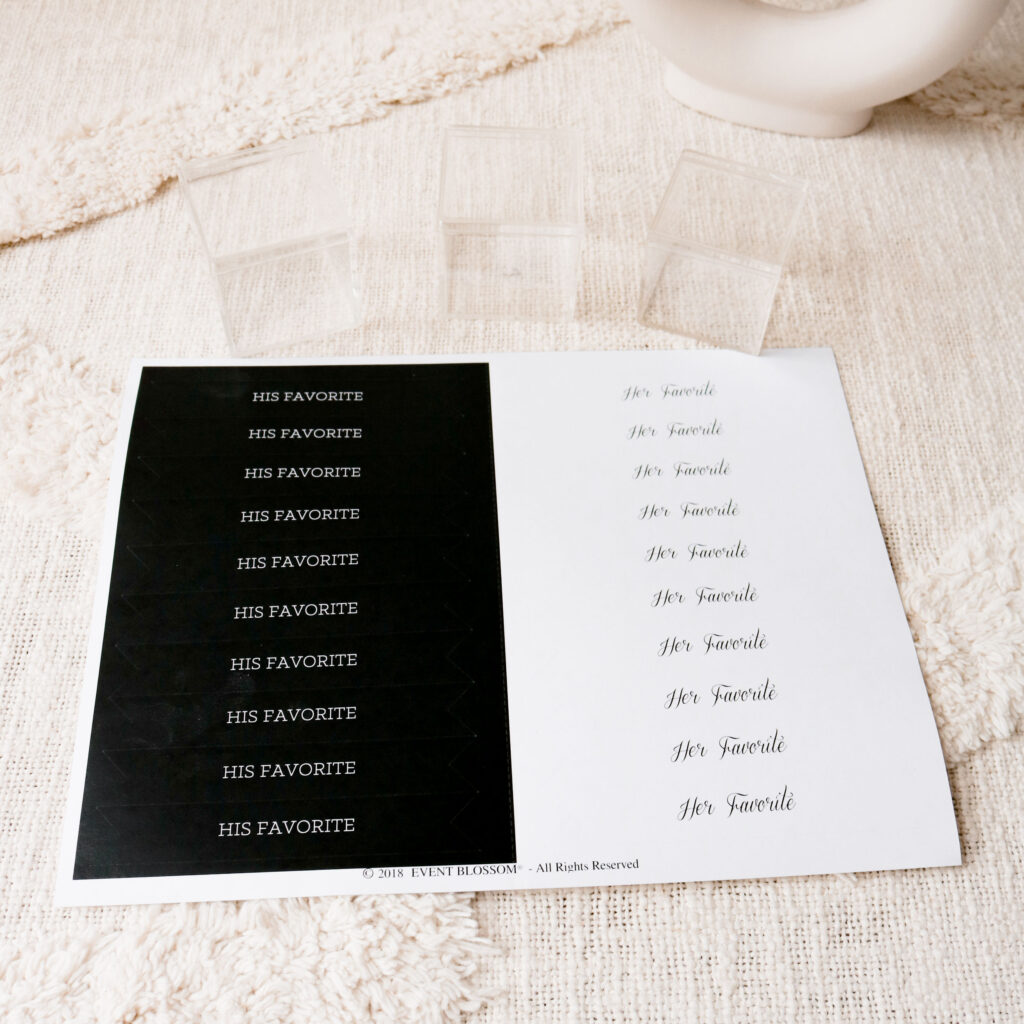
- Clear Acrylic Favor Boxes (One set with White Labels for “Her Favorite”)
- Clear Acrylic Favor Boxes (One set with Black Labels for “His Favorite”)
Step 1 – Gather Your Supplies:
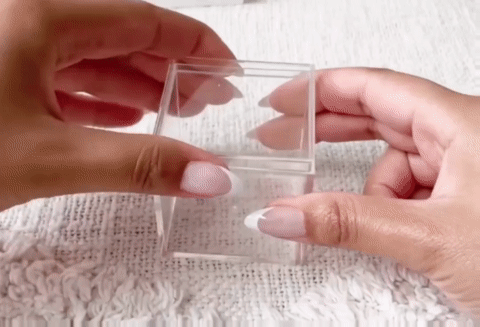
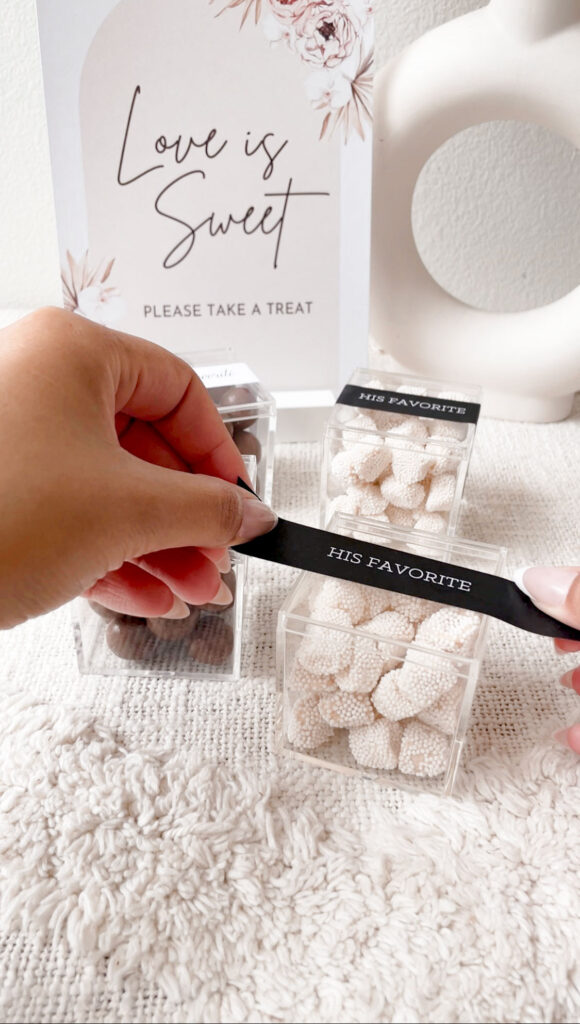
Before we can get started, the first and foremost step is for you to obtain all the items you will need to craft your own His & Hers candy wedding favors. You’ll want to head to weddingfavorites.com and select one of our clear candy favor box styles. You can choose styles from clear acrylic squares, and round glass candy favor jars, to mini glass mason jars in various sizes. Each option comes with its own label style that can be personalized. When you go to place your order, make sure that you’ve selected two different label styles, one for “his” and one for “her”.
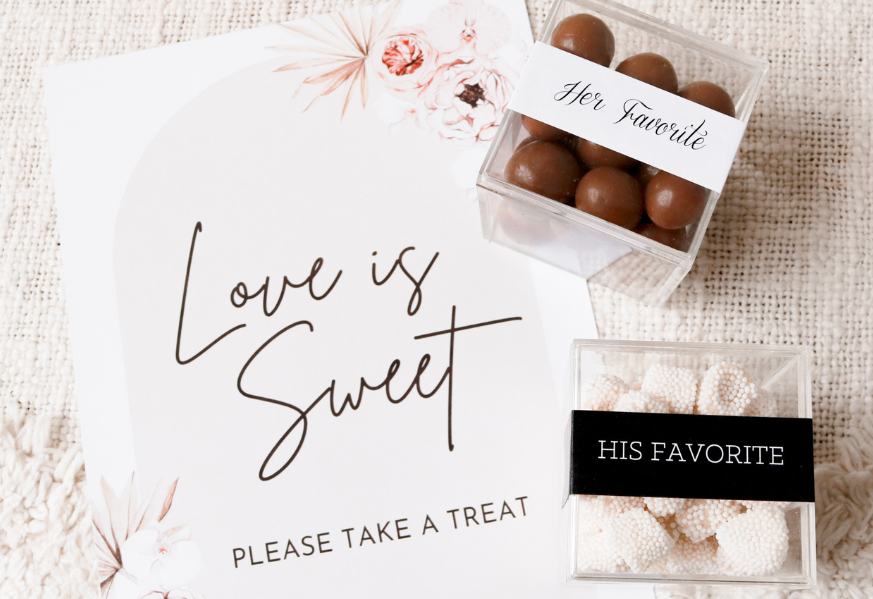
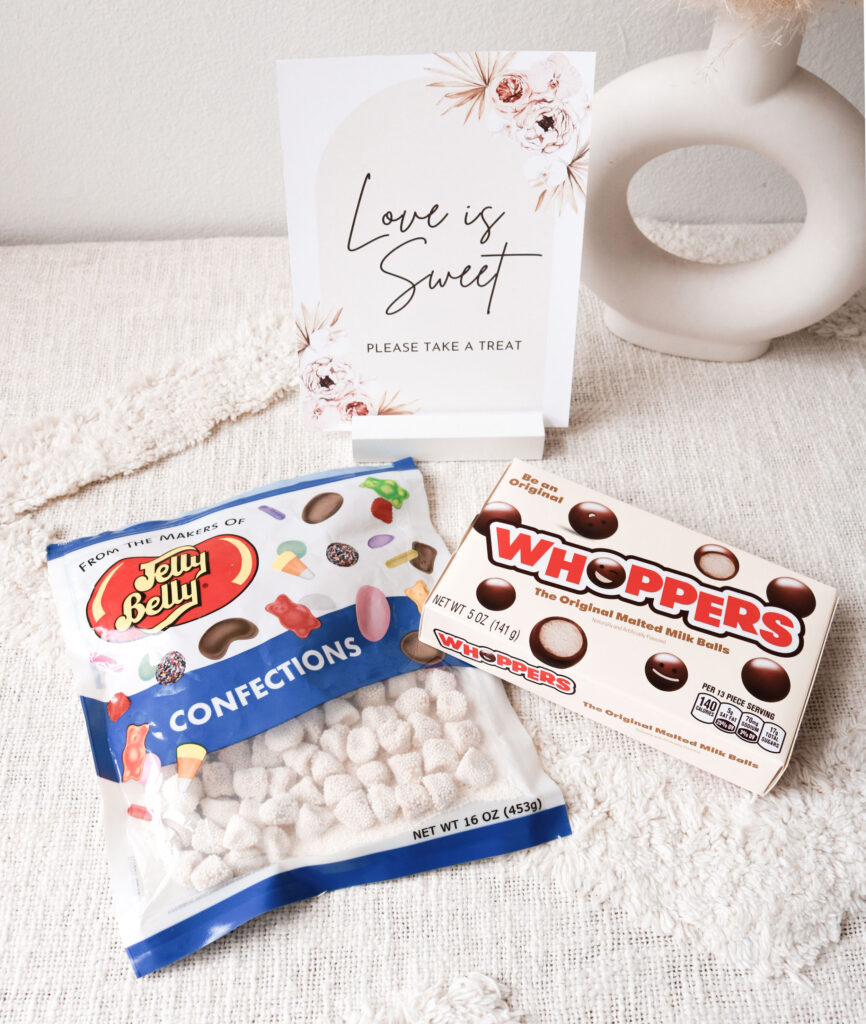
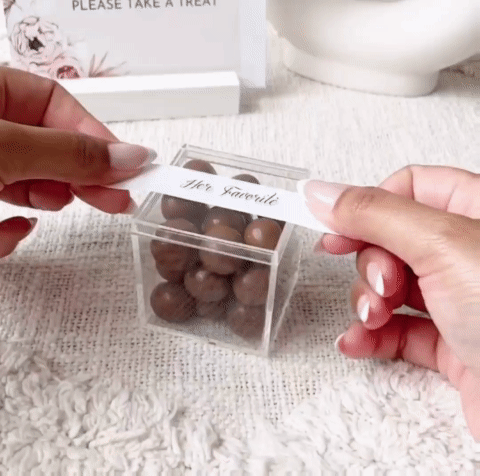
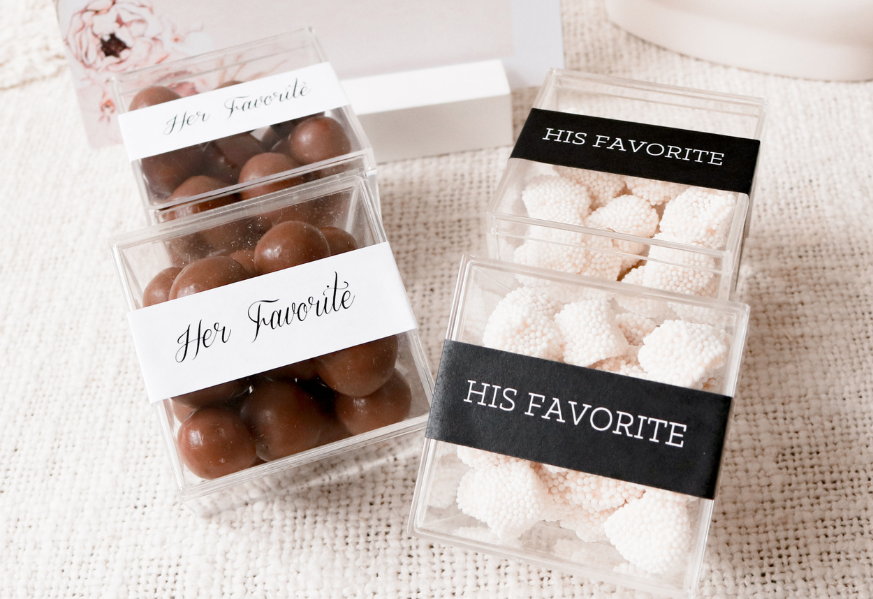
We opted for these Clear Acrylic Favor Boxes with white labels for “her” and black labels for “his”. Additionally, our favorite candies of choice were Jelly Bean Confections and Chocolate Whoppers. Yum!
Step 2 – Assemble “Her Favorite” Candy Favors
Once you have all of your items in one place, you’ll need to separate them. Organization is key! So, if you’ve purchased 80 containers, move 40 to one side for “her” and 40 to the other side of the table for “his”. Move the correct candy to each side of the table, so that you won’t accidentally make too many containers with the same type of candy. We want to make sure there are an equal number of giveaway candy favor boxes for all your guests.
Now, you’ll want to start filling the containers. We started with “Her Favorite”, Chocolate Whoppers. Open the containers one at a time, and fill to the top with her favorite candy!
Most likely, you’ll have a lot of boxes to fill. We recommend utilizing the Pomodoro Technique, a time management strategy invented by Italian Francesco Cirillo, which suggests that you should focus on one single task at a time for about 25 – 30 minutes, then take a 5-minute break. After 4 Pomodoro sessions, take a longer break of about 10 – 15 minutes. This way, you can maximize your efficiency by intensely focusing on one task at a time!
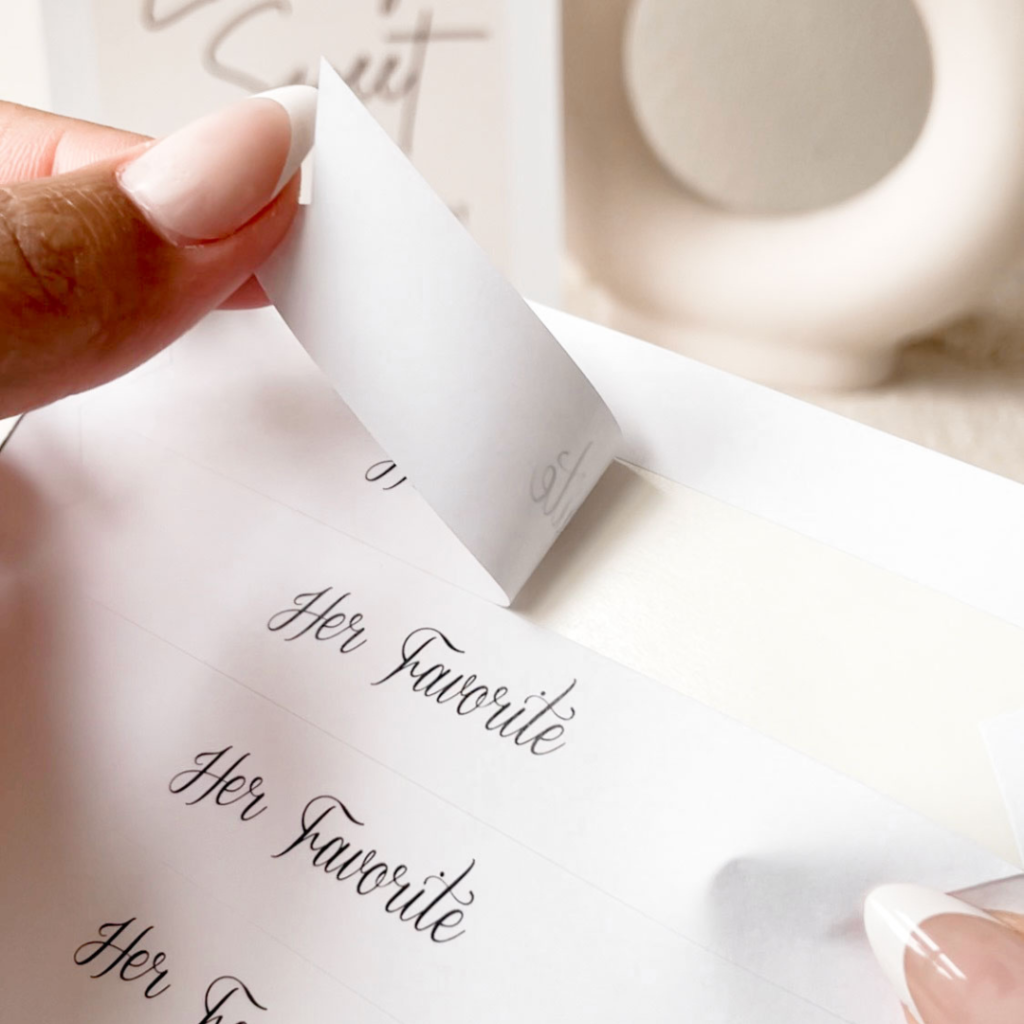
After you’ve filled all the containers with her candy, next you’ll want to peel & apply the labels. Remember to drink water and take breaks when needed to prevent wedding DIY burnout. You’ll gently peel the label from the sheet, center and align them to the container, press and seal them. That’s it!
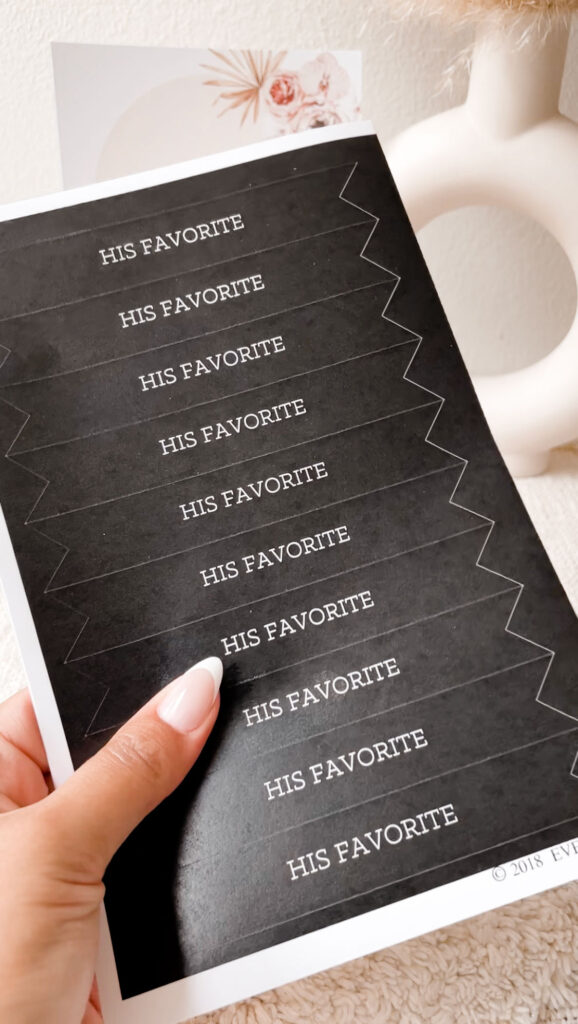
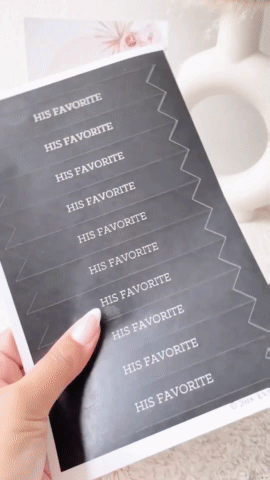
Step 3 – Repeat for “His Favorite” Candy Wedding Favors
After you’ve completed “Her Favorites” it’s time to make candy containers for the hubby! Just like a relationship, it takes 2. You’ll follow the same steps from Step 2 when you made the bride’s candy wedding favors. So get “his” boxes, candy, and labels. Then, fill, peel, stick and you’re ready to go!
This simple and cute DIY is a manageable and thoughtful parting gift for your guests at your wedding. It’s easy enough to do that if you’re too busy with other equally important wedding tasks, this could quickly be delegated to a Maid of Honor or Bridesmaid. This technique could also be used for other occasions because the labels are personalized. Think, birthday parties, baby showers, bridal showers, and more! You can insert any sweet treat of your choice that will fit inside the box. Pro Tip: We recommend pairing a dark candy with lighter labels so that the candy favors appear more dramatic in photos! (take a look at the example below 😉)
And that’s a wrap! Simple, yet beautiful, this delightful project is a perfect addition to any celebration and tells a symbolic story about you and the groom. Your personalized touch will resonate with your guests since these charming favors reflect your creativity and thoughtfulness. If you are inspired to include this DIY in your upcoming wedding celebration, tag us @weddingfavorites so we can share it with other brides!