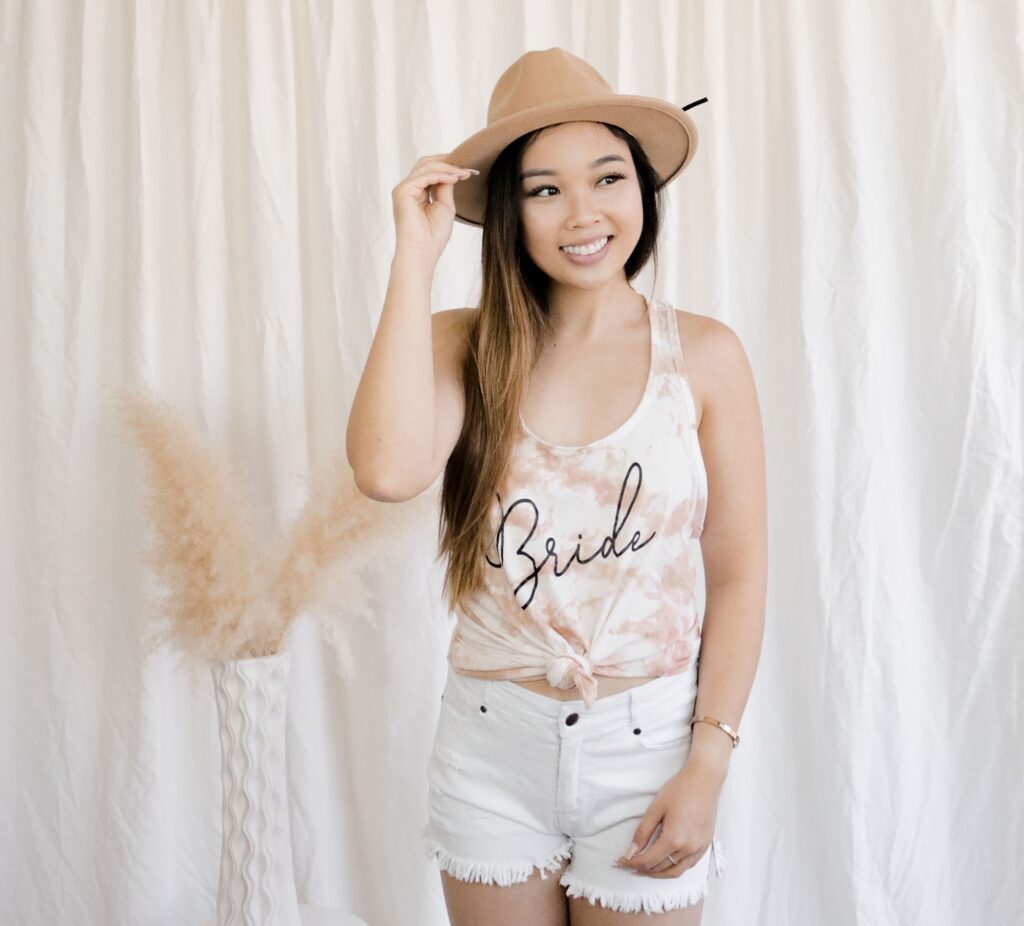
Tie dye has been one of the biggest DIY trends this year and we’re obsessed! These DIY tie dye shirts are a great way to spice up your bachelorette tees and take your wedding shirts to the next level! Here’s how to create your own neutral tie dye masterpieces to incorporate into your wedding festivities.
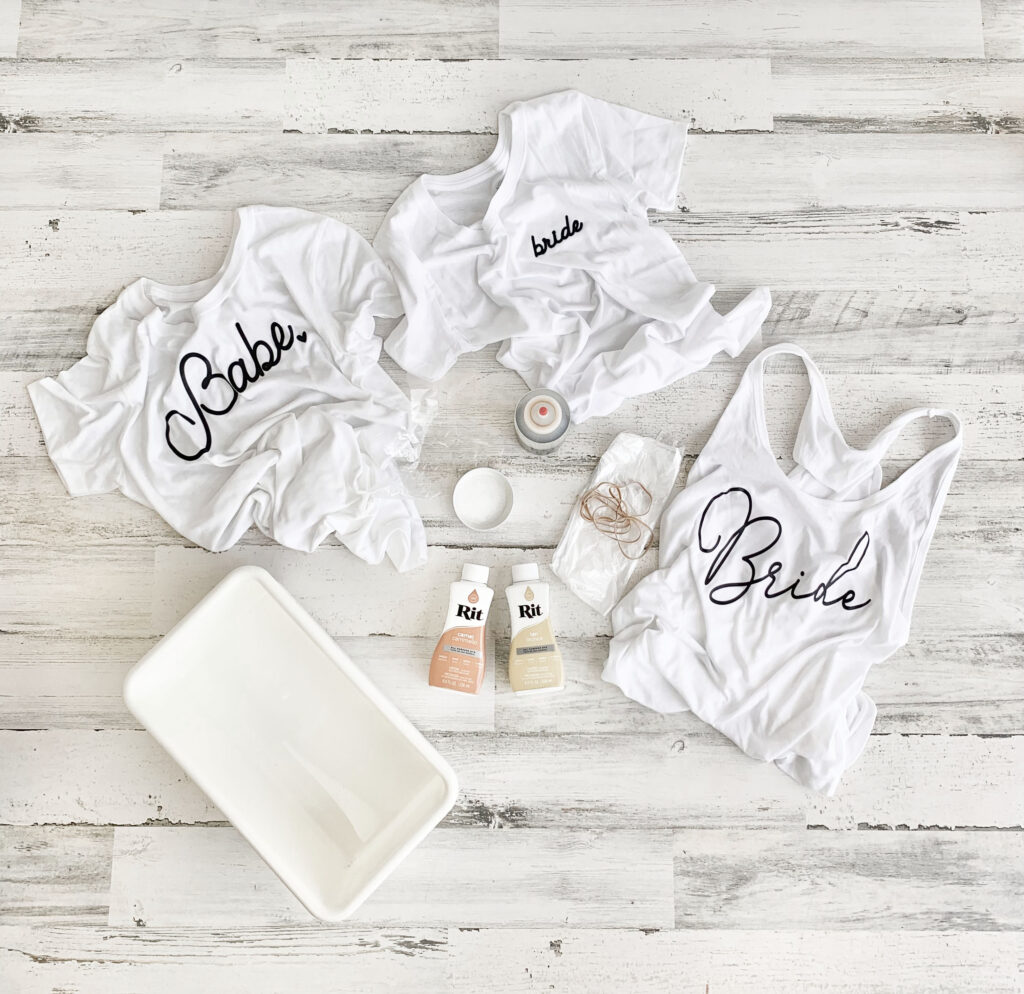
Here’s What We Used:
- Bridal Tanks & Shirts (cotton works best)
- Plastic gloves
- Rubber Bands
- Squeeze bottle
- Salt
- Rit Dye in Camel & Tan
- Trash bag
- Plastic bin
- Warm water
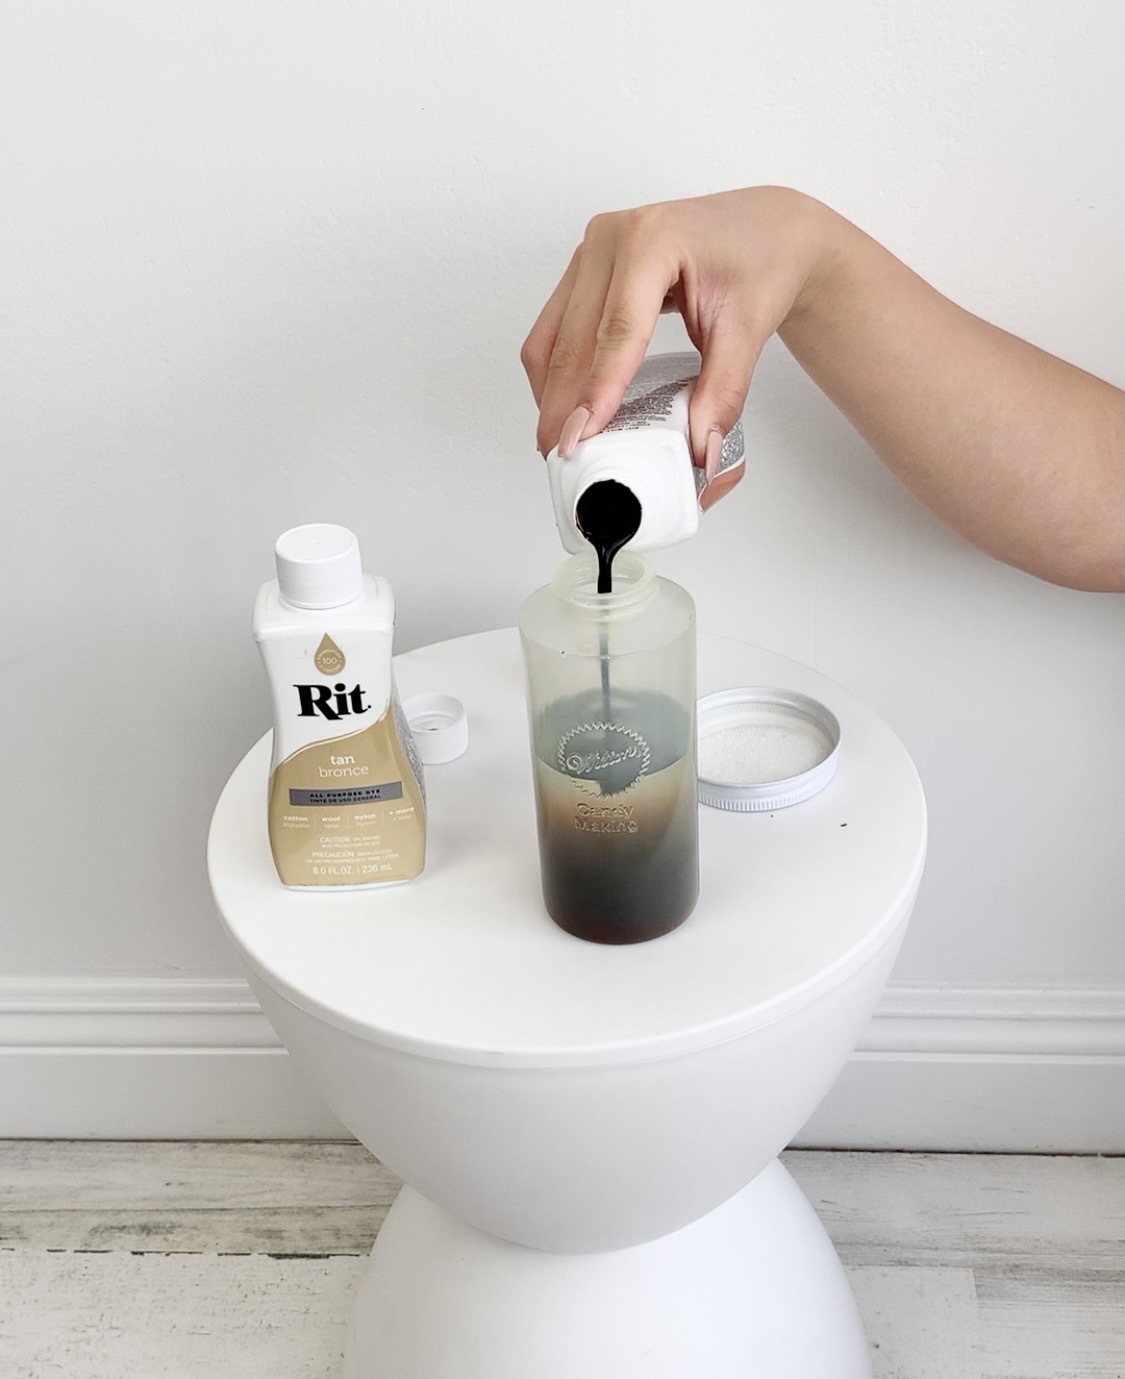
Making Your Dye:
To start, you need to prepare your dye! First, fill your squeeze bottle halfway with warm water and a teaspoon of salt. Next, add your dye colors (we went for a combo of camel and tan), close it up, and shake. If you are choosing to do more than one color, we suggest labeling your dye bottles so you don’t get them mixed up!
To test the color, take a paper towel and dip it into the dye bottle. Then adjust as necessary until you have the color you want. (Remember the color will look darker than how the final product will turn out).

Prepping Your Tees:
To prepare your tees, you have a few methods to choose from. There’s the classic spiral method, stripe, ombre, and so many others to choose from. We chose the scrunch method to fold our shirts but you can choose whatever technique you like best! Each t-shirt pattern will come out differently depending on what folding method you choose so this is your time to experiment and have fun with it.


Time To Tie Dye:
Now it’s time to start the tie dying process! Caution, the dye can transfer so we suggest working outside with a plastic bin and gloves on just in case the dye stains anything. First, submerge your shirts in water until they are soaked, and squeeze out as much excess water as you can. Transfer them into a large bin and begin dying away!
Next, squeeze the dye directly onto the shirts making sure to saturate the exposed areas with color. Each shirt will have varying colors and patterns depending on the technique you use!

When you think you’re almost finished, we suggest opening the shirt to check your progress. If there are any patches or white areas, rescrunch the tee and add more dye as needed!
After, use your tees to soak up the excess dye at the bottom of the tub then transfer to a plastic bag and leave to set for at least 2 hours. (You can leave them longer if you’d like).
Wash & Dry:
After the two hours have passed, you’re set to untie your rubber bands and unfold your shirts to reveal the final pattern. Do not panic if the color is super dark, it will lighten once washed & dried!
Before putting the tees into the wash, make sure to rinse and wring them out until the water runs clear. This helps get as much excess dye out before putting it in the washing machine. Run your shirts through a normal wash & dry cycle and you are all done!


Throw on your new shirts and have a cute bachelorette photoshoot with your girls! We can’t wait to see all the different patterns & designs you come up with. Don’t forget to tag us on Instagram if you recreate our DIY tie dye shirts!
Have fun!